13 Jun Port forwarding for Icom Radios
Last Updated on June 17, 2021
Configuring port forwarding for Icom radios can seem to be a dark art.
Hopefully, this post will make things just that little bit easier.
The new and free wfview software has generated a lot of interest in the amateur radio world around controlling Icom radios remotely. Icom sells the RS-BA1 software which has similar functionality.
Configuring port forwarding for Icom radios in modems and routers can be a dark art if you haven’t done it before, so hopefully, this video will make things just that little bit easier.
This post and how-to video describes how to configure a TP-Link Archer modem, which is a very popular VDSL modem here in Australia, to port forward to an Icom IC-705 or the Icom RS BA1 v2 software.
A word of warning before you start
In Australia, many ISPs use CGNAT (Consumer Grade Network Address Translation) to bundle many customers onto one external IP. This prevents external requests from being forwarded to ANY device on your home network, so don’t get caught out on an internet connection that can’t do what you want it to do. There is no workaround for this except to change providers or pay a little more for a service that’s not behind a CGNAT. It may pay to do a little research to see if your ISP allows this before losing your hair!
Remotely operating these radios inside your home network is straightforward, but what if you want to control a radio away from the shack?
You may want to allow a fellow operator access to your radio from their QTH, or maybe you want to access your station while on holidays. In this case, you’ll need to configure your internet modem or router to make this possible.
Before you head out into the wild, it may pay to download a copy of BKTtimesync from the software tab. This software listens to the output of the built-in GPS in your IC-705 and accurately sets the PC’s clock.
A good and reliable internet connection is required. Even 2 bars on 4G doesn’t really cut it as I’ve found the waterfall features on both wfview and the RS BA1 software are data-intense and makes all functions of the software slow. The lag can make simple tasks like changing mode of frequency arduous, so if you’re going bush, keep this in mind.
Modern Icom radios use 3 UDP ports for remote operation. Port 50001 is the control port. Port 50002 is the CIV port, and port 50003 is for audio.
What we need to do is configure your router to listen out for traffic or packets on these ports externally and pass them on – or forward them to the radio when received. This is known as port forwarding.
A cautionary word of warning. Some internet providers in Australia DO NOT allow external access to your internet modem.
Some ISPs put all their normal domestic connections behind a CG-NAT (Carrier Grade Network Address Translation). This means your “external” address is actually shared with many other users, and there’s no way to forward incoming traffic specifically to your router. It may pay to do a little research to see if your ISP allows port forwarding to your modem.
DHCP
First a little background on how devices on your home network, and in this case, your IC-705, gets allocated an IP address.
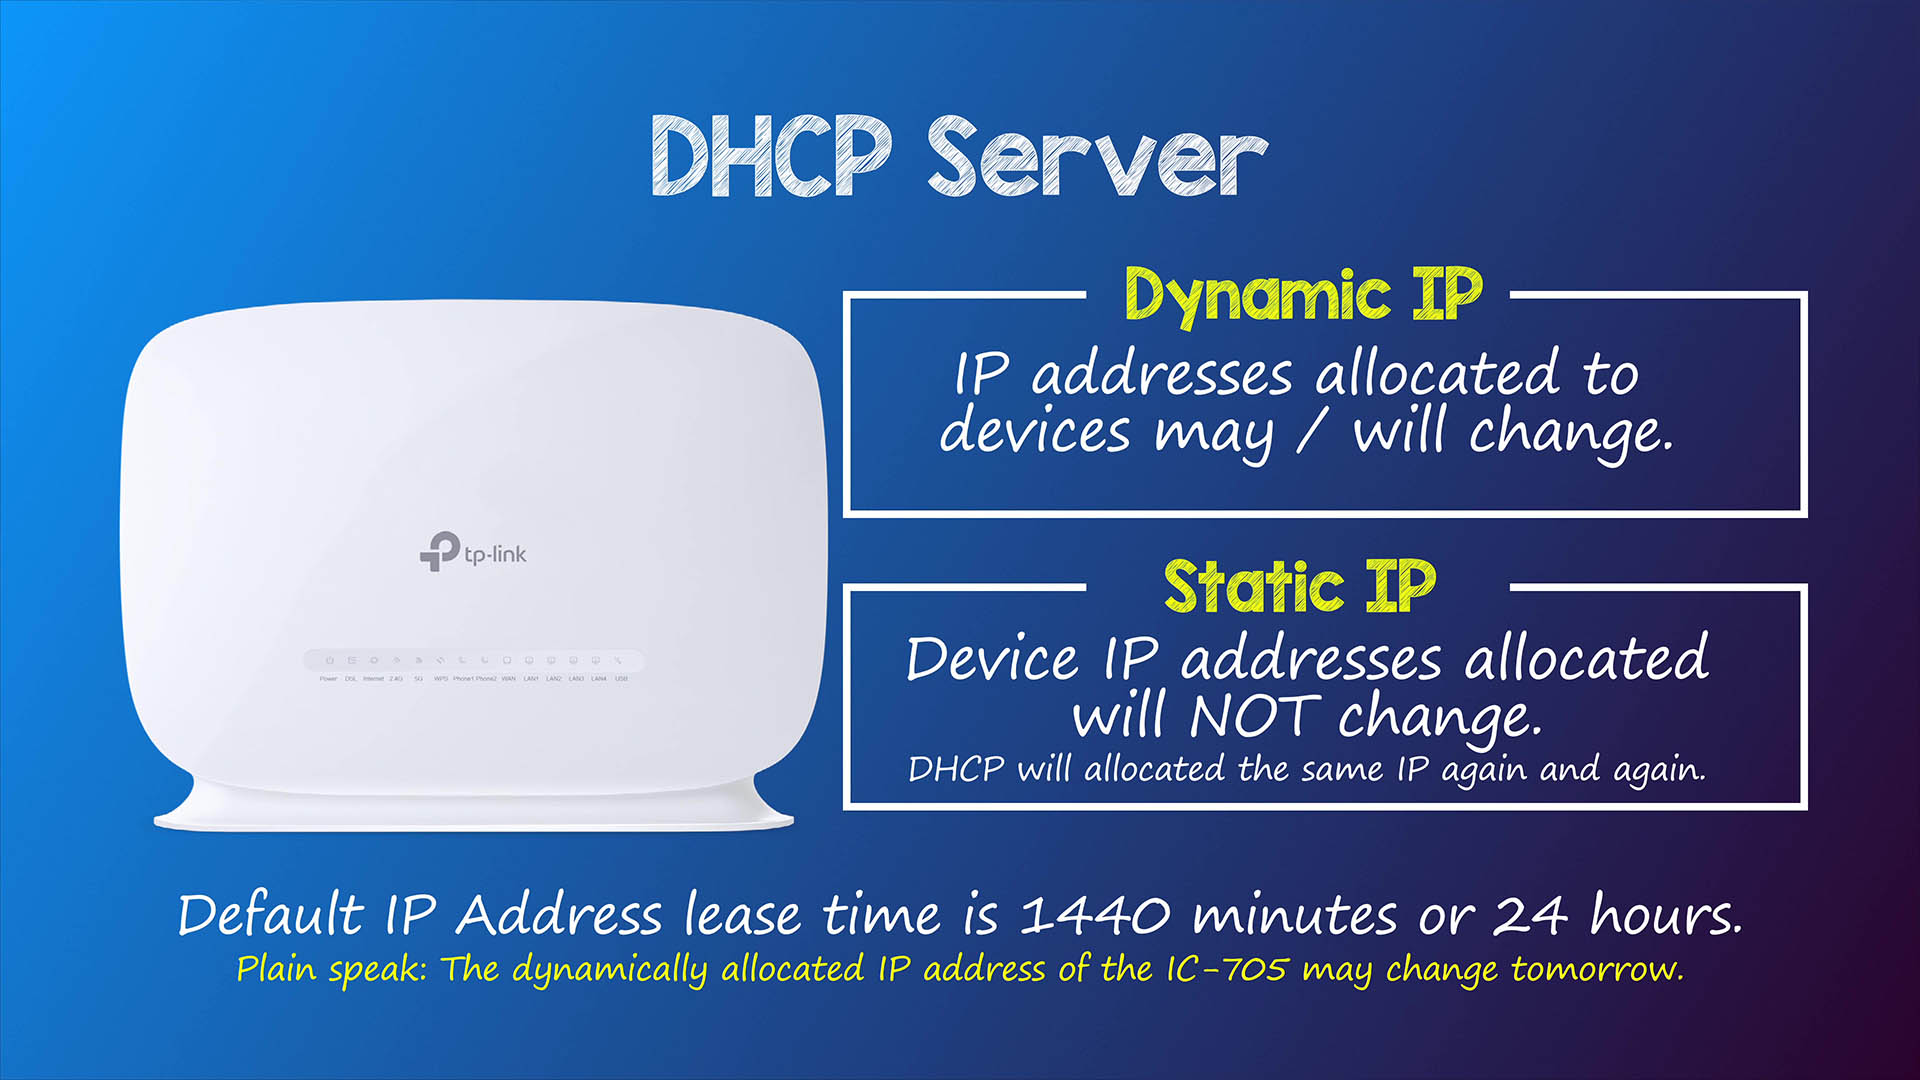
Your modem has a built-in DHCP server. It’s the job of this DHCP server to allocate IP addresses to devices connected to your home network. This includes things like phones, laptops, smart speakers, printers, televisions and now radios such as the IC-705 and the IC-9700. Any radio connected to your PC via an ethernet cable.
The IP addresses allocated to these devices are not permanent and may change unless you tell the DHCP server otherwise.
The default time allocation of an IP address, which is know as the address lease time, is 1440 minutes or 24 hours. After this time, the IP address allocate to a specific device MAY change.
This is fine for most devices, as an IP address change will go unnoticed, but if you’re away from the shack and trying to connect to your radio, you don’t want the IP address of your IC-705 to change, so we need to create an address reservation.
An address reservation tells the DHCP server to allocate the same IP address to a device over and over again. In other words, it’s a static IP.
WiFi and the IC-705
Make sure you’ve connected your IC-705 into your home network as per the instructions in the manual. By the way, the IC-705 only supports 2.4 GHz Wireless networks. It doesn’t support 5 GHz wifi which is a bit of a shame if you think of the speeds that 5 GHz WiFi can achieve.
To check it’s connected to your home WiFi network, on the radio press MENU -> SET -> WLAN set -> CONNECTION SETTINGS (station) and look for DHCP
You should see an IP address in this field. In my case, 192.168.0.61. This address has been allocated to the radio by the DHCP server in the modem.
If it’s blank, you need to check your radio’s connection to your home network and restart the radio. Your radio must be connected to the network to proceed.
If all is good, make a note of the radio’s IP address and using your favourite web browser, log in to your modem or router.
Setting up port forwarding for Icom radios in the router or modem
The local IP address, as well as the username and password of the modem, is usually printed on the device. A common address is 192.168.1.1. Another way of finding the address is by running ipconfig at the command prompt on a windows device. The gateway address is the one you want.
Now we’ll make the IP address of the IC-705 static, and configure the modem to pass external requests to the static address of the radio.
Log in and you’ll see the homepage of the modem. This page, on most modems, will show you the public, or external IP address. Click the Advanced tab in this case, then the network tab, followed by LAN settings. On other modems look for the DHCP settings.
In the address reservation section click the add button then the scan button. Browse until you find the IC-705 then click the plus button. The current mac and IP address will populate the reservation settings. If you haven’t already, make a note of the IP address and click save. Your radio now has a reserved or static IP address.
Right now, any request to your external IP address will go unanswered, so let’s get the modem to listen out for packets on ports 50001, 50002 and 50003 and pass them on to your IC-705.
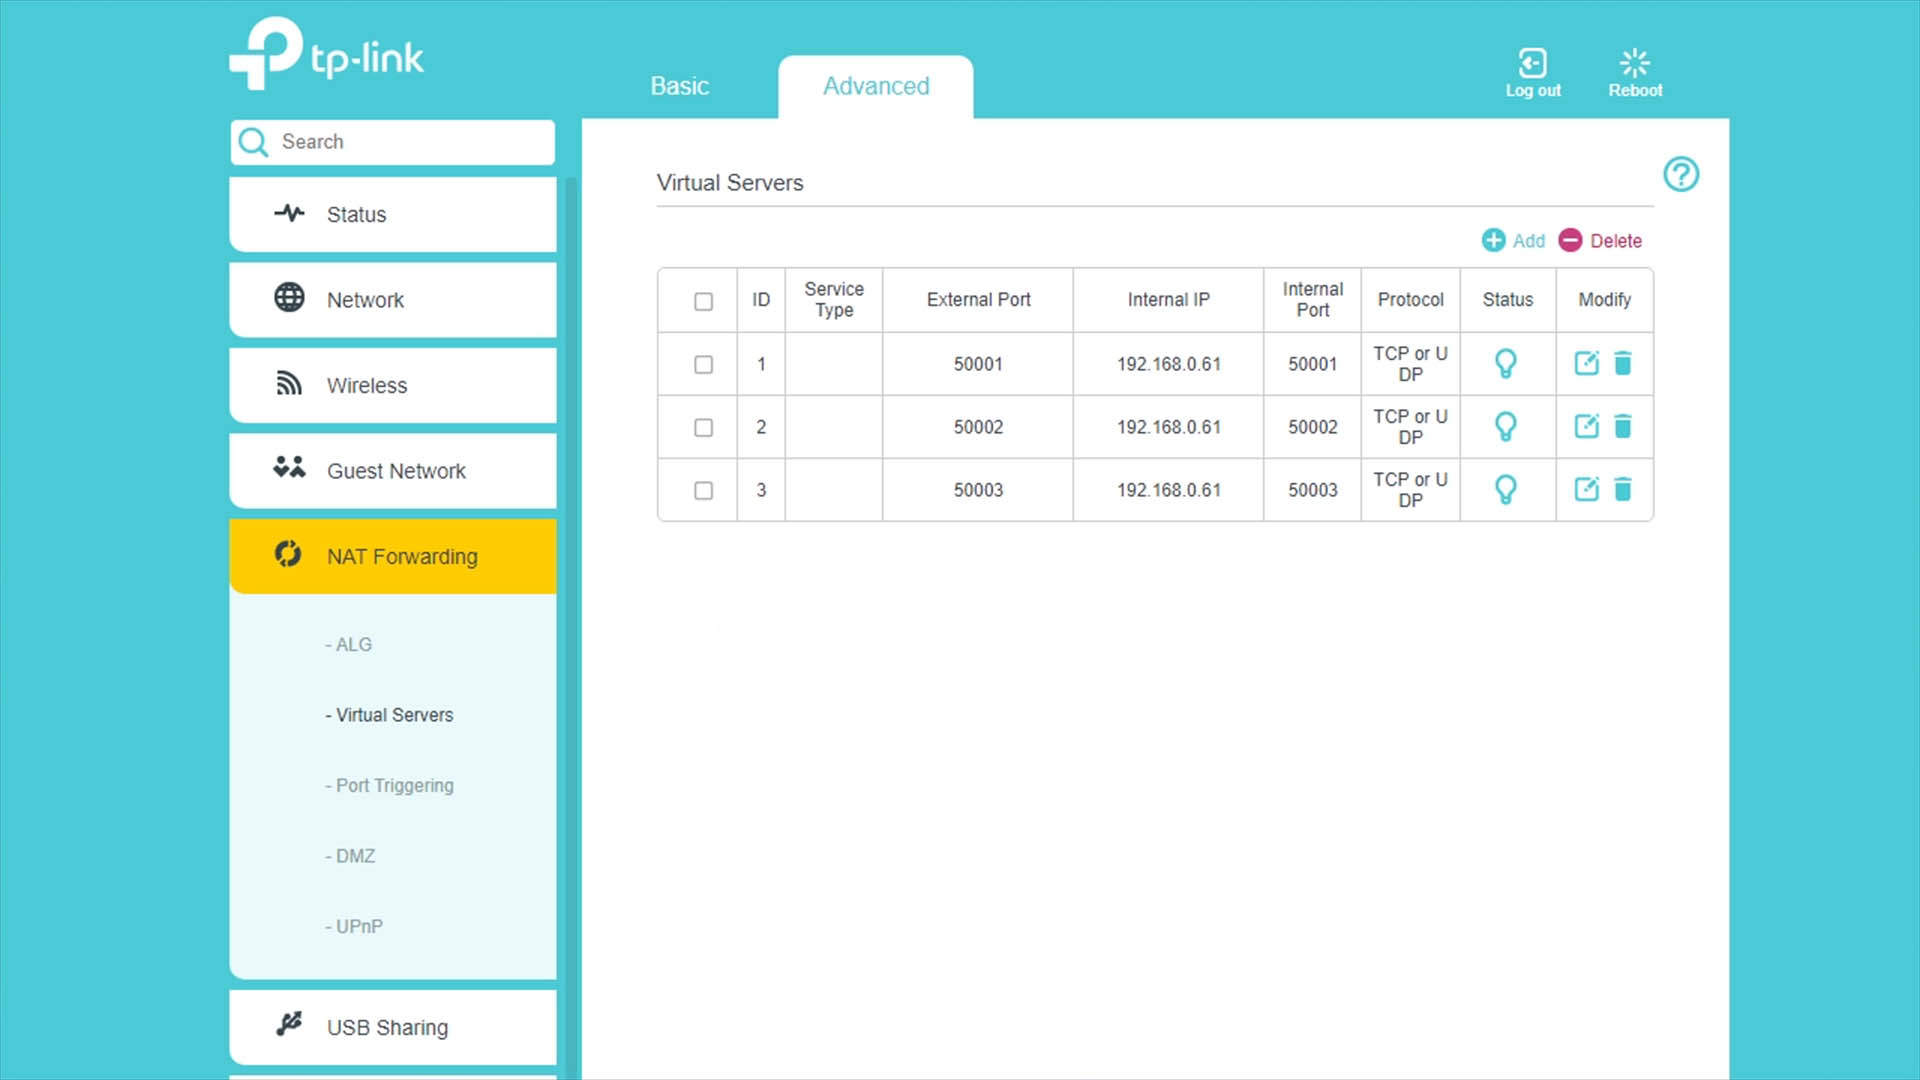
Staying in the advanced tab, select NAT Forwarding then Virtual Servers. Click the add button.
We’re going to make three entries here, one for each port. In the External Port enter the first Icom port number of 50001. This tells the modem to listen for requests on port 50001 from the internet. In the Internal IP, enter the IP address of your IC-705. This tells the modem where to forward the request it hears on the internet to internally.
The Internal Port needs to be set to 50001 and protocol to ALL (or UDP). Click Save and repeat this process for the remaining two ports 50002 and 50003. By now you should have an understanding of why we need to fix the IP address of the radio.
Testing Times!
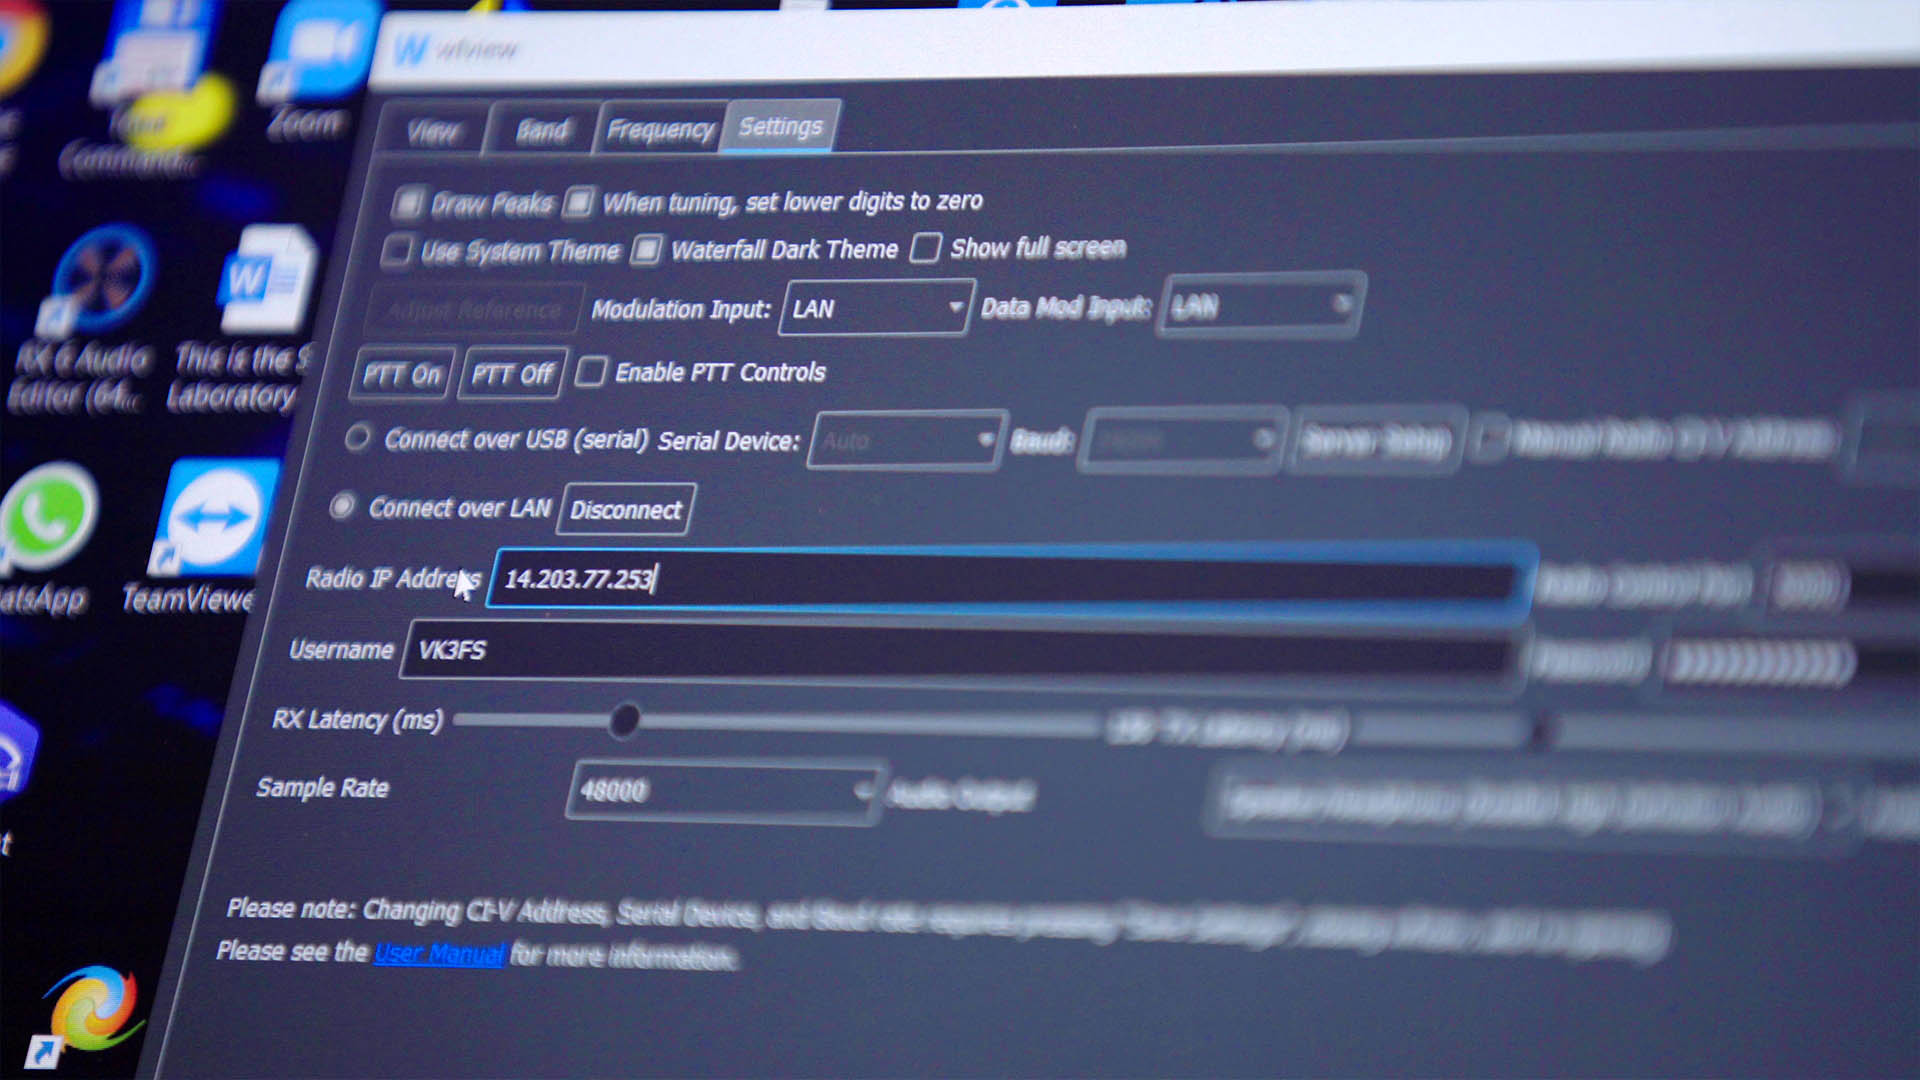
Now all that needs to be done is to test your handy work, but that’s how you set port forwarding in your modem or router. Load up wfview or the RS BA1 software on your laptop and tether your laptop to your phone making sure you’re not connected to your home network. Using wfview, head to the settings tab.
In the radio IP address field, enter your public IP address. This is the address on the basic page of your home modem, or visit a site like whatsmyip.org to get your public IP. The radio control port should be left as 50001 and the username and password are that which you set in either your user 1 or user 2 settings in the IC-705.
Hit the connect button and wfview should come to life if all is configured correctly. The dark art of routing IP addresses, even port forwarding for Icom radios, can be challenging for those who have never had to do such things.


