
12 Sep IC-705 uWave Box
Last Updated on September 12, 2024
IC-705 uWave Box
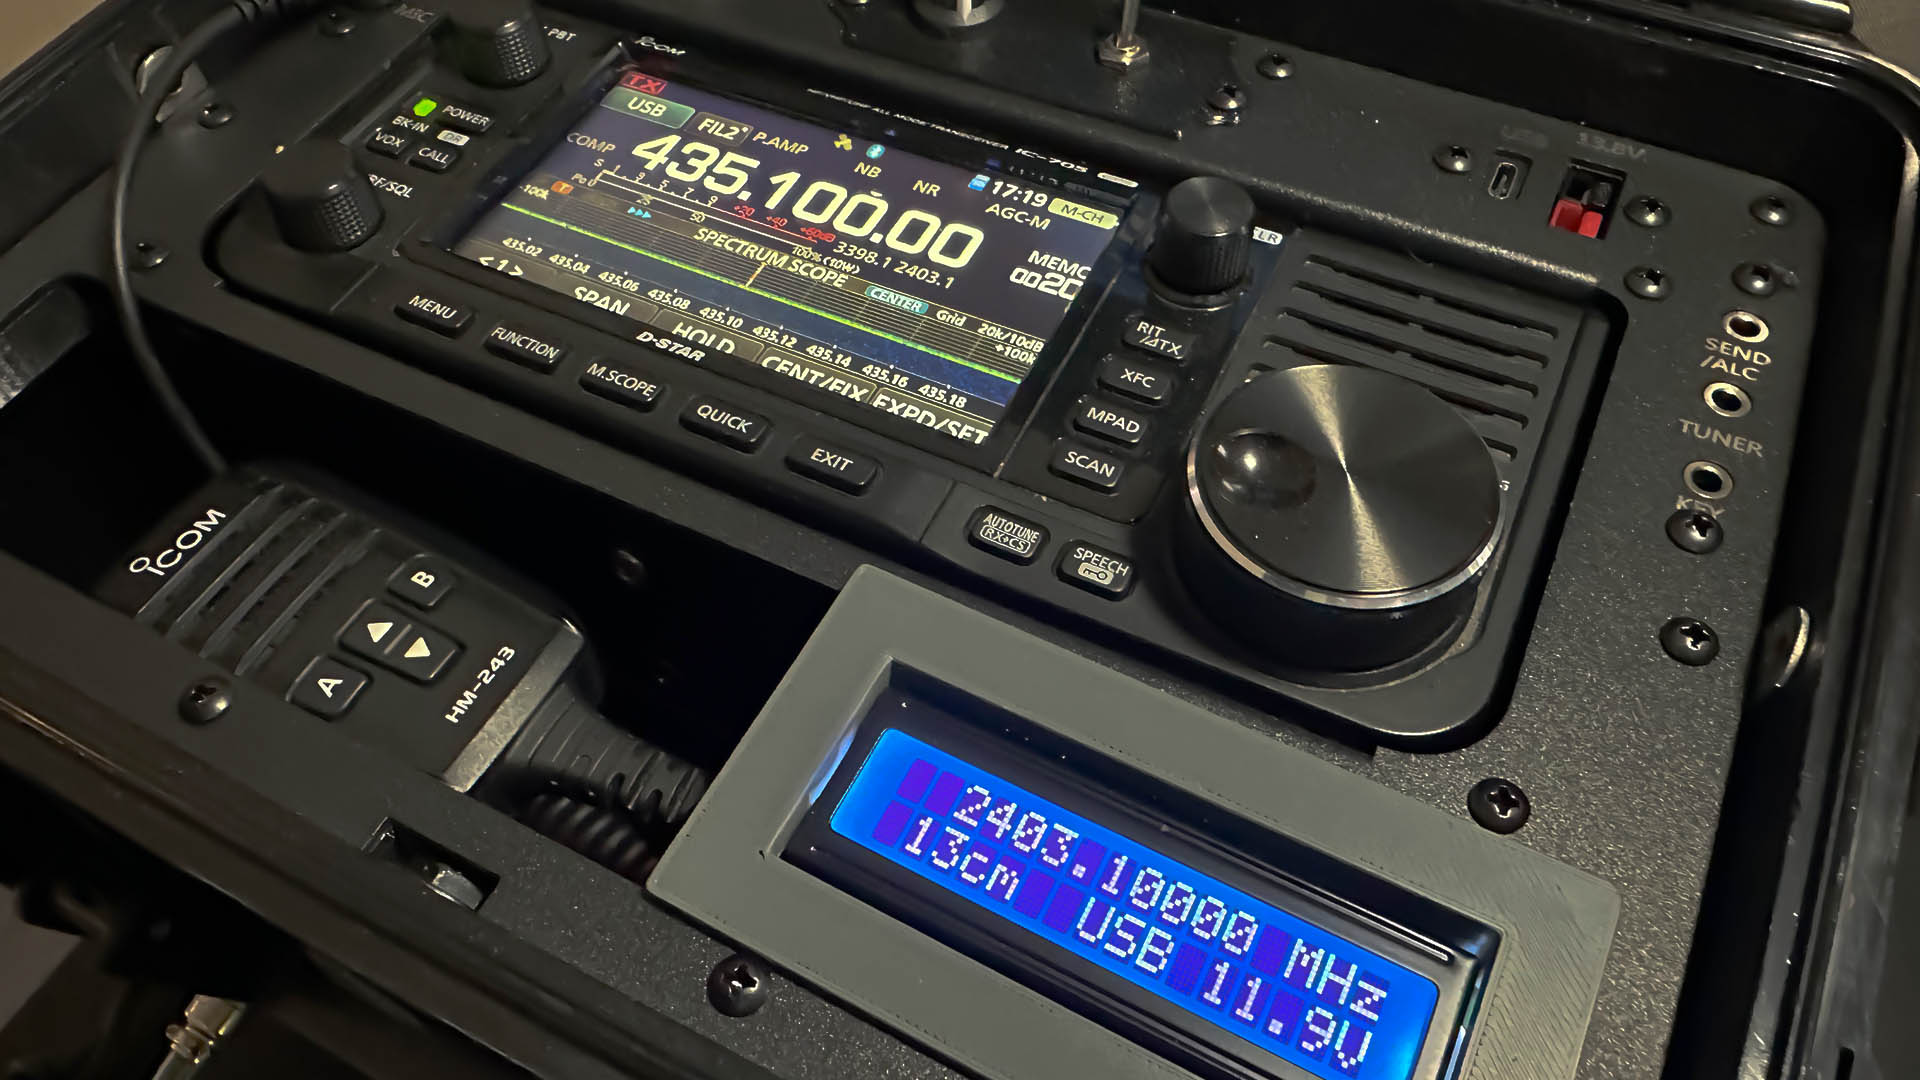
The Ic-705 was first launched into the amateur radio community in 2020. It was a radio with a new and unique form factor. Back then I built the radio into a pick-and-pluck equipment case which has worked well over the years. Recently I’ve added a 2 line LCD display which is programmed to show a transverse output frequency, mode, and the battery voltage of a built-in LiPo battery.
The IC-705 uWave or transverter display is an ESP-32 project written by Paul VK3DIP. Paul’s project has been published on the NERG website and the sketch can be downloaded from his site.
I use the IC-705 as an IF radio for microwave. When portable, I run all bands from 23cm to 10 GHz. With the best plans of programming the transverters with the same IF, that just wasn’t possible. I use the memory names in the radio to display the transverter output frequencies but even that has some issues, so when Paul’s project came along I jumped at the chance to build it into my 705 box.
I found the box on Ali Express. It was labelled as an Outdoor Waterproof Radio Box Carry Cage w/ Metal Panel Perfect For IC-705 Transceiver Radio. There are many sellers with different colour options. It cost me around $250 AUD to land it here in VK. The box itself is solid with a metal insert that is easily lifted out of the case for easy installation of your 705. f you just want to use it as a go-box, it’s perfect as is. I’ve rejigged it slightly for my use which I’ll outline below. I don’t use some of the connectors on the face of the caddy as I want to minimise cables and cable strain during operation.


The Box
The Ali Express box comes pre-cabled with everything you need to extend all the options from the radio. The fittings are very well made and quite robust. There is also a dividing plate which partitions the radio from the lower storage are of the case. The radio screws into the lift-out cage using the provided screws. There is quite a bit of space surrounding the radio should you want to add electronics and additional batteries like I have to your kit.
The box also comes with a carry strap which fixes to fittings on the side of the case. I haven’t used this yet.
It’s a good solution to storing your radio especially if you use it when portable. It will certainly protect it when it’s packed with other gear in the back of your vehicle.
Note the small removable panel in the top centre of the box. There is nothing behind this panel and it allows easy expansion by additions of external projects. I’ve used this space for the PCB of the microwave transverter display as well as its controls.

The IC-705 Display by Paul VK3DIP

How it works
As mentioned above, the IC-705 uWave or transverter display is an ESP-32 project written by Paul VK3DIP. Paul’s project has been published on the NERG website and the sketch can be downloaded from his site. A detail description is contained in the pdf on the NERG website.
Essentially Paul has used the Bluetooth connectivity in the IC-705 to talk to the DSP-32 processor which has a built-in Bluetooth receiver. Once paired, it listens for any change in the display frequency or mode and updates the display accordingly. Instead of using a multi-position switch, Paul has used a pot to select bands. There are seven band options ranging from “no transverter” through to transverter 6 which defaults to 124 GHz.
Each transverter setting is programmed in code to cater for the IF of your transverter so you’ll need to edit and write back to the DSP-32 to suit your needs.
I’ve also moved and changed the RF output connector to the side of the box along with the PTT which is used with the transverters. This is primarily due to keeping cables away from the operational controls of the radio and for cable relief. It also allows the lid to be closed quickly and easily should the weather turn bad.
The voltage displayed in the lower right-hand corner is the supply voltage of the device. This is super handy when portable to keep an eye on the battery voltage that powers the display. I use a 12v 18650 pack which charges when the unit is connected to volts via the Anderson connector, and supplies volts to the display when the box is in a stan alone configuration.
The printed circuit board you see in these pictures is one I’ve made for NERG members. I have a few spares so contact me if you’d like one.


In conclusion, this IC-705 case makes portable operation super easy, especially for microwave operation. The solid and sturdy case protects your investment as well it allows a bit of space for add-ons such as the microwave VFO seen here. All the I/Os of the radio are catered for, including the USB which means that once the radio is fitted, there’s really no need to remove it.